Running pixel-only tracking means a meaningful share of your Purchase or Lead events never reach Meta. On iOS devices where users opt out of tracking, the browser event is blocked at the source. Your campaign optimization signals are working from incomplete data, and your reported ROAS is higher than reality. This guide covers the complete Meta Pixel setup: base code installation, standard events for both ecommerce and lead generation, Conversions API with deduplication, and a verification workflow to run before any campaign goes live.
What this guide covers
- Create your pixel in Events Manager and save the Dataset ID (your Pixel ID).
- Install the base code via Shopify's native integration or manually in
<head>. - Ecommerce track: configure ViewContent, AddToCart, InitiateCheckout, and Purchase with required parameters.
- Lead-gen track: configure Lead on the confirmation page only, plus CompleteRegistration and Contact.
- Add the Conversions API, set matching
event_idon both sides, and verify deduplication is working.
What the Pixel Does (and Why Browser-Only Isn't Enough)
The Meta Pixel is a JavaScript snippet that fires in the browser when a visitor takes an action on your site. When it fires, it sends an event to Meta: PageView, ViewContent, AddToCart, Purchase, Lead, and so on. Meta uses those signals to optimize ad delivery, measure conversions, and build retargeting audiences.
That works until the browser gets in the way. Apple's App Tracking Transparency framework, introduced with iOS 14.5, lets users opt out of cross-app tracking. When a user opts out, the pixel's browser event is blocked. For ecommerce stores with a high iOS customer base, pixel-only tracking can miss 30 to 50 percent of purchases depending on the opt-out rate among their customers.
The Conversions API (CAPI) sends the same events directly from your server to Meta, bypassing the browser entirely. Running both the pixel and CAPI with matching event IDs lets Meta deduplicate them automatically so you get complete signal without inflating your conversion count. For a full breakdown of what iOS opt-out costs in real campaigns and how to measure the gap, see our iOS attribution guide for Meta ads.
![]()
Before You Start
Three things to confirm before you open Events Manager.
You need Business Manager admin access, or Events Manager "dataset editor" access for the relevant Business Account. Shopify merchants also need store owner or staff access with "Manage sales channels" enabled.
Manual installs require editing the <head> of your site's HTML, either directly or through a theme editor or tag manager. Have a developer available if you're not managing the code yourself.
Decide now whether your primary conversion is a Purchase or a Lead. This determines which standard event you prioritize in Aggregated Event Measurement, which is how Meta attributes conversions for iOS users who've opted out of tracking. You can only put one event at the top of the priority list.
Step 1: Create Your Pixel in Events Manager
A quick note on naming: Meta calls the pixel a "dataset" in some parts of the Events Manager UI. If you see "Create a dataset" instead of "Create a pixel," you're in the right place. The Dataset ID and Pixel ID are the same number, shown with different labels depending on which screen you're on.
- Go to Meta Events Manager.
- Click Connect Data Sources in the left sidebar.
- Select Web, then click Connect.
- Choose Meta Pixel and click Connect again.
- Name your pixel. Use your brand or client name.
- Enter your website URL (optional here).
- Click Continue. Your Dataset ID appears on the next screen. Copy and save it.

![]()
That Dataset ID is what goes into your base code and what you'll select in Ads Manager at the ad set level when you configure a campaign.
Step 2: Install the Base Code
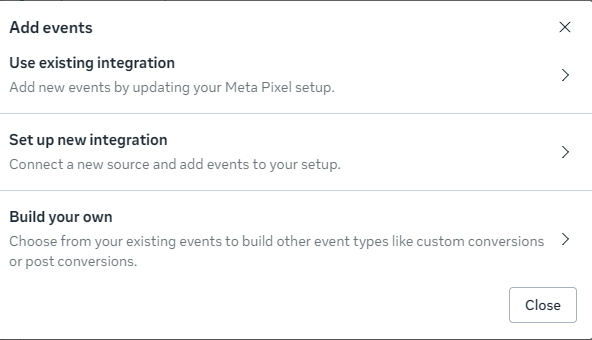
Two paths: partner integration or manual. Partner integrations are the right default for Shopify and most major platforms. Manual install is for custom stacks or platforms without a native Meta connection.
![]()
Path A: Partner Integration (Shopify)
Shopify's native integration handles the base code, standard ecommerce events, and CAPI in one connection. Start here if you're on Shopify.
- In your Shopify admin, go to Settings → Customer events.
- Click Add app pixels, then select Meta Pixel.
- Connect your Facebook account and Business Manager.
- Select your pixel from the dropdown.
- Set data sharing to Maximum. This enables both the pixel and CAPI through Shopify's Commerce Platform.
- Save.
Shopify automatically fires PageView, ViewContent, AddToCart, InitiateCheckout, and Purchase. You don't need to add event code to your theme.
For WordPress, use the official Meta Pixel plugin or PixelYourSite. For WooCommerce, use the Facebook for WooCommerce plugin.
Path B: Manual Install
Paste the base code between the <head> and </head> tags on every page of your site.
![]()
Placing the code in <head> rather than before </body> reduces the chance of ad blockers and other scripts loading before the pixel. Per Meta's pixel documentation, this placement also increases the probability of tracking visitors who leave quickly. The base code fires a PageView event automatically on every page load. No extra code needed for that.
After installing the base code, move on to configuring your standard events.
Step 3: Configure Events (Ecommerce Track)
Four standard events cover the core ecommerce funnel. Here's where each fires and what parameters you need.

ViewContent: Product Detail Page
Fires when a visitor loads a product page.
fbq('track', 'ViewContent', {
  content_ids: ['SKU-123'],
  content_type: 'product',
  value: 49.99,
  currency: 'USD'
});
content_ids must match the product IDs in your Meta product catalog for Dynamic Product Ads retargeting to work.
AddToCart: Cart or Button Click
Fires when an item is added to the cart, either on cart page load or triggered by an "Add to Cart" button click.
fbq('track', 'AddToCart', {
  content_ids: ['SKU-123'],
  content_type: 'product',
  value: 49.99,
  currency: 'USD'
});
InitiateCheckout: First Checkout Page
Fires when the user reaches the checkout flow.
fbq('track', 'InitiateCheckout', {
  num_items: 2,
  value: 99.98,
  currency: 'USD'
});
Purchase: Order Confirmation Page
Fires on the order confirmation page only, after payment is processed and confirmed.
fbq('track', 'Purchase', {
  value: 99.98,
  currency: 'USD',
  content_ids: ['SKU-123', 'SKU-456'],
  content_type: 'product'
});
value and currency are required for value-based bidding and ROAS reporting in Ads Manager. content_ids and content_type are required for Dynamic Product Ads. According to Meta's standard events reference, Purchase is the only standard event with required parameters. Missing any of these four disables the downstream features that depend on them.
Step 4: Configure Events (Lead-Gen Track)
Three standard events cover most lead-gen conversion flows.
Lead: Thank-You Page Only
Fires when a lead form is successfully submitted. Place this on the confirmation page the user lands on after submitting, not on the page that displays the form.
fbq('track', 'Lead', {
  value: 50.00,
  currency: 'USD'
});
The most common lead-gen pixel mistake is placing the Lead event on the form page itself. Depending on your form completion rate, this inflates your lead count by 5 to 10 times, sends corrupted optimization signals to Meta, and produces CPL numbers that don't reflect actual cost per acquired lead.
Including value is optional but worth doing if you have a target CPL. It enables value optimization, which directs Meta to prioritize users who are more likely to convert at or above that value point.
CompleteRegistration: Multi-Step Flows
Use this for multi-step registration flows: free trial signups, demo booking flows, quiz completions, or any conversion where the user goes through more than one screen before the final confirmation.
fbq('track', 'CompleteRegistration', {
  value: 0.00,
  currency: 'USD',
  status: 'true'
});
Contact: Click-to-Call or Live Chat
Fires when a user initiates a phone call or opens a live chat. Useful for service businesses where inbound calls are the primary conversion.
fbq('track', 'Contact');
Parameters are optional for Contact.
Step 5: Add the Conversions API
CAPI sends your events from the server rather than the browser, filling in the signal gaps the pixel can't reach. For a deeper look at what iOS opt-out costs in practice and how to quantify it for your account, see our iOS attribution guide.
This section covers the fast path. If you're weighing Shopify native against a partner app, server-side GTM, or a manual build, our guide to setting up the Meta Conversions API compares all five methods and shows how to confirm deduplication is actually working before you spend.
Shopify: Already Done
If you set data sharing to Maximum in Step 2, Shopify has already enabled CAPI through its Commerce Platform integration. To verify: Events Manager → your pixel → Settings → confirm "Conversions API" shows as connected.
Other Platforms: Conversions API Gateway
For non-Shopify sites, Meta's Conversions API Gateway is the most straightforward option for teams without API development resources. It's a containerized server you deploy to your own cloud account (AWS, GCP, or Azure) that proxies your pixel events server-side. No custom API code required.
Teams with developer resources can implement the Conversions API directly for more control over event payload and parameter customization.
Deduplication: The Step Most Guides Skip
When both the pixel and CAPI fire for the same event, Meta receives two copies of that conversion. Without deduplication, both count. Your reported conversions inflate, CPAs look lower than actual, and your campaign optimization trains on data that doesn't match reality.
The fix is an event_id parameter sent with both events. When Meta sees two events with the same name and event_id, it deduplicates and keeps one.
Browser pixel event:
fbq('track', 'Purchase', {
  value: 99.98,
  currency: 'USD',
  content_ids: ['SKU-123'],
  content_type: 'product'
}, {
  eventID: 'order-78234'
});
CAPI server event payload (simplified):
{
  "event_name": "Purchase",
  "event_id": "order-78234",
  "event_time": 1715789200,
  "user_data": { ... },
  "custom_data": {
    "value": 99.98,
    "currency": "USD",
    "content_ids": ["SKU-123"],
    "content_type": "product"
  }
}
Two rules for deduplication to work, per Meta's deduplication documentation:
- The
event_idvalue must be identical on both sides. Use a stable, unique identifier: order ID for Purchase, lead ID for Lead. Don't generate it separately on each side. - The
event_namemust match exactly, including case.Purchaseandpurchaseare treated as different events by Meta's matching logic.
If event_id is missing from either side, Meta keeps both events and double-counts.
Step 6: Verify with Test Events
Don't launch a campaign without running this check. If an event isn't firing correctly, you'll find out now instead of after you've spent budget on bad signal.
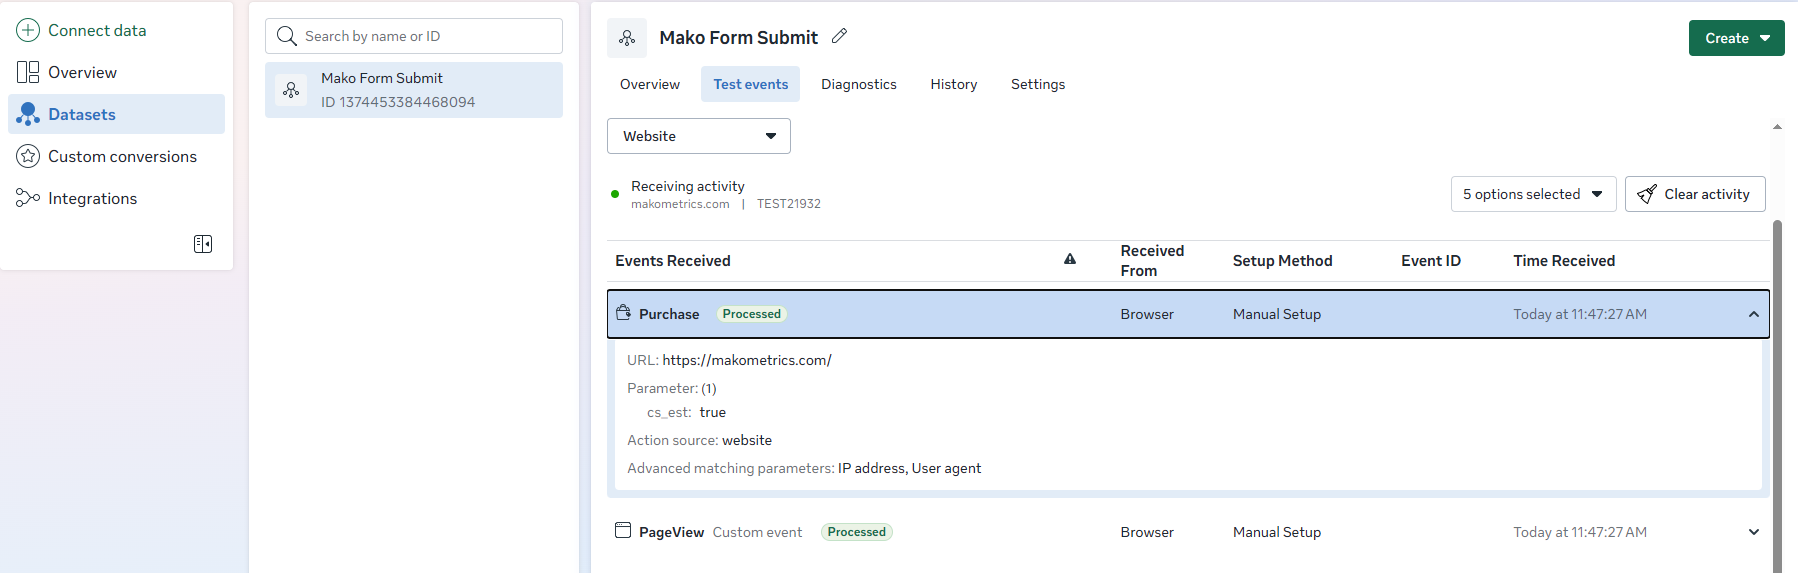
Verification workflow:
- Go to Events Manager → your pixel → Test Events tab.
- Enter your website URL in the "Test browser events" field, then click Open website.
- On your site, trigger each event you configured: load a product page, add something to cart, go through checkout, reach the order confirmation page (or submit a test lead form on a lead-gen site).
- Watch the Test Events panel. Each event should appear within a few seconds with its name, timestamp, and parameters.
- Check Event Match Quality for each event. Aim for 6.0 or higher. Lower scores mean Meta can't reliably match the event to a user profile, which reduces how well the algorithm can optimize delivery.
Two reasons Test Events may show nothing:
The dropdown defaults to whichever pixel was last open. Confirm the Dataset ID in the Test Events dropdown matches the ID in your base code or Shopify connection.
On WordPress or any cached site, the page served during your test may pre-date your pixel installation. Clear the site cache and reload before triggering test events.
Step 7: Connect Your Pixel to a Campaign
With events verified, here's how to wire the pixel into a campaign correctly.
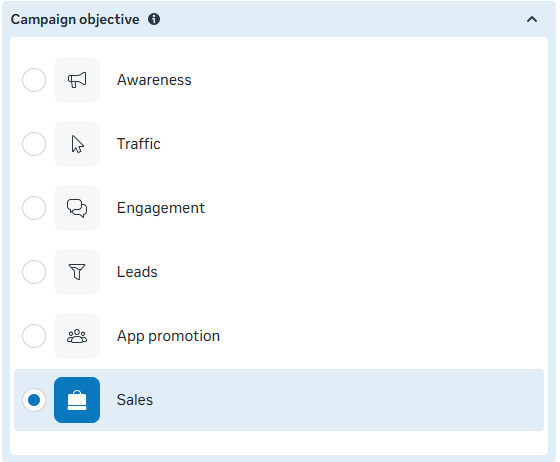
Select the Right Objective and Event
When creating a new campaign in Ads Manager:
- Ecommerce: Select Sales as the campaign objective.
- Lead-gen: Select Leads as the campaign objective.
At the ad set level, under the "Conversion" field, select your pixel/dataset from the dropdown and choose the event: Purchase for ecommerce, Lead for lead gen. The objective you choose at the campaign level tells Meta what to optimize for; the event you select at the ad set level tells it exactly what action to count.
Set Aggregated Event Measurement Priority
This step matters for iOS users who've opted out. Meta can attribute only the highest-priority event that fired for each opted-out user. If you haven't set priorities, Meta assigns them automatically.
Set them manually:
- Events Manager → your pixel → Aggregated Event Measurement → Configure Web Events.
- Ecommerce: set Purchase as priority 1, AddToCart as priority 2.
- Lead-gen: set Lead as priority 1.
Per Meta's iOS 14 documentation, each pixel supports up to 8 prioritized events. Keep the list limited to the events you're actively optimizing toward.
![]()
Once your pixel is live and your campaign is configured, the next layer is structuring the full funnel around it. See our guide on building a full-funnel Facebook ads strategy for ecommerce.
Before you scale spend, see the kind of competitive read you can get. The Mako Metrics sample reports show how we lay out a brand's live creative from the Meta Ad Library: the formats, hooks, and offers it runs. See sample reports.
Troubleshooting: 5 Common Pixel Problems
Most pixel problems fall into one of these five categories.
1. Duplicate Events: Purchase Count Is Double
Cause: Shopify's native pixel integration is active, and pixel base code is also manually pasted into the theme. Both fire on the same user action.
Fix: Use one method only. If you're using the Shopify native integration (the recommended path), remove any pixel code added manually to your theme's <head> or theme.liquid. Search your theme code for your Pixel ID to find and remove duplicates.
2. CAPI Deduplication Not Working
Cause: The event_id is missing on one side of the setup, or the event_name doesn't match exactly between pixel and CAPI (including case).
Fix: Confirm both events include the same event_id for each transaction. Confirm event_name strings match exactly on both sides. Reference Meta's deduplication documentation for the matching requirements.
3. Test Events Tab Shows Nothing
Cause: The wrong pixel is selected in the dropdown, or caching is serving a page that pre-dates your pixel install.
Fix: Match the Dataset ID in the Test Events dropdown to the one in your base code. Clear your site's cache before triggering test events. On WordPress, clear the caching plugin. On Shopify, this is rarely an issue.
4. Lead Event Fires on Form Display, Not Form Submit
Cause: The fbq('track', 'Lead') call is on the page that shows the form, not on the confirmation page after a successful submission.
Fix: Move the Lead event to the URL that only loads after a successful form submission. If you don't have a dedicated thank-you page, trigger the Lead event via a JavaScript event listener on form submit, not on page load.
5. Purchase Event Missing Parameters
Cause: The Purchase event fires without value, currency, or both.
Fix: Update the event call to include both. Without value and currency, value-based bidding is disabled and ROAS reporting in Ads Manager shows blank. Without content_ids and content_type, Dynamic Product Ads retargeting breaks.
If your pixel is confirmed live and all parameters look correct but conversions still aren't showing in Ads Manager, the problem is likely in campaign configuration or attribution settings. See our Facebook ads conversion troubleshooting checklist for the next set of checks.
Before You Launch
- Pixel created in Events Manager. Dataset ID saved.
- Base code installed via one method only: partner integration or manual, not both.
- Standard events configured for your goal type: Purchase (ecommerce) or Lead (lead-gen), with required parameters.
- Conversions API enabled with matching
event_idon both pixel and CAPI events. - Test Events confirmed: each event fires, parameters are correct, Event Match Quality is 6.0 or higher.
This post covers the tracking piece of the pre-launch workflow. For the full campaign setup that comes after tracking is confirmed, see our guide to building a Meta ad campaign.